💻 User interfaces
Learning Objectives
User interfaces provide the gateway between a user and a complex application.
When navigating the internet, we continually interact with web pages to access data and interact with complex web applications.
A
By static, we mean that the server’s job was just to hand over the HTML document, and then the browser takes over. A user may interact with the browser’s interface, e.g. to scroll, type in a text field, or drag-and-drop an image around, but this is done purely by interacting with the browser - the browser won’t talk to the server about this.
🛑 Character limit
Learning Objectives
Let’s define a problem.
Suppose we’re working on a website where users will need to comment on articles. In the user interface, they’ll be provided with a textarea element where they can type their comment. However, there is a character limit of 200 characters on their comment. As users type in to the textarea they should get feedback on how many characters they’ve got left for their comment.
We can define acceptance criteria for this component:
Given an textarea and a character limit of 200,
When a user types characters into the textarea
Then the interface should update with how many characters they’ve got left
🏁 Starting point
In the user interface, we will start off with some static html:
<!DOCTYPE html>
<html lang="en">
  <head>
    <meta charset="UTF-8" />
    <meta name="viewport" content="width=device-width, initial-scale=1.0" />
    <title>Document</title>
  </head>
  <body>
    <section>
      <h3>Example character limit comment component</h3>
      <label for="comment-input"
        >Please enter your comment in the text area below
      </label>
      <textarea
        id="comment-input"
        name="comment-input"
        rows="5"
        maxlength="200"
      ></textarea>
      <p id="character-limit-info">You have 200 characters remaining</p>
    </section>
  </body>
</html>
To implement the acceptance criterion, we’ll need to interact with the elements on the page. We’ll need a way to access and update elements based off user interactions.
Youtube: Step-through-prep workshop 🔗
🧭 Strategy
Learning Objectives
To implement the character limit component, we need to update the interface as the user types in the text area. We can outline a strategy as follows:
This strategy gives us a rough guide for the road ahead. However, as we learn more about this problem, we may need to update our strategy.
🌲 Interacting with the page
Learning Objectives
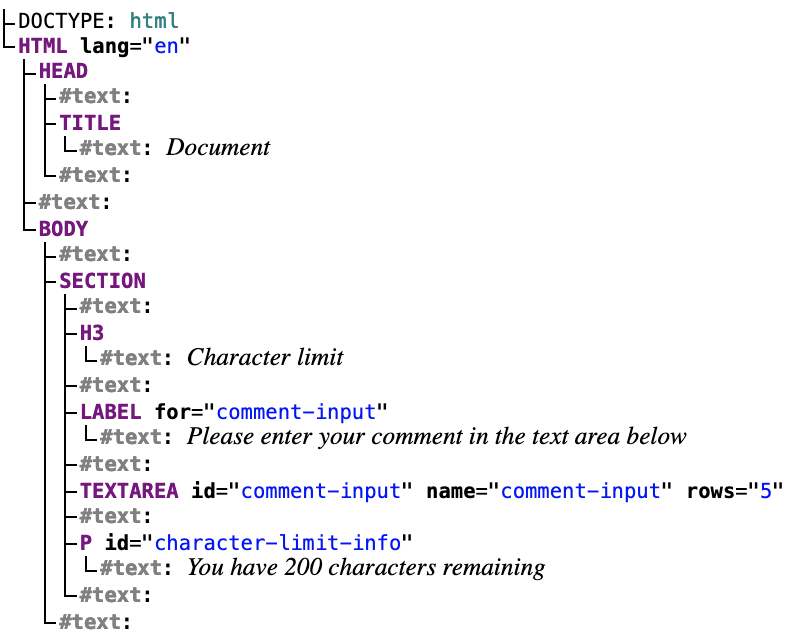
Let’s consider the starting html. We need a way of interacting with the elements of this page once it is rendered.
<!DOCTYPE html>
<html lang="en">
  <head>
    <meta charset="UTF-8" />
    <meta name="viewport" content="width=device-width, initial-scale=1.0" />
    <title>Document</title>
  </head>
  <body>
    <section>
      <h3>Character limit</h3>
      <label for="comment-input"
        >Please enter your comment in the text area below
      </label>
      <textarea id="comment-input" name="comment-input" rows="5"></textarea>
      <p id="character-limit-info">You have 200 characters remaining</p>
    </section>
  </body>
</html>
🌳 HTML tree
HTML documents form a tree-like structure. We start at the top html element and from there other html elements are nested inside.
When we use a web browser, it takes this HTML document, and provides us with an interface - a visual representation of the document, which we can read, and interact with (e.g. with a keyboard and mouse).
Document Object Model
When the browser first renders a web page it also creates the DOM - short for
Just like a web browser provides us a visual interface, the DOM is an interface. But it is not an interface for humans to see and interact with, it is an interface for JavaScript to interact with. We can write JavaScript programs to interact with the Document Object Model so we can make the page interactive.
Use Dev Tools to inspect the character limit component from earlier.
🔎 Querying the DOM
Learning Objectives
Inside the body of the html document, we start with the following html:
<section>
  <h3>Character limit</h3>
  <label for="comment-input"
    >Please enter your comment in the text area below
  </label>
  <textarea
    id="comment-input"
    name="comment-input"
    rows="5"
    maxlength="200"
  ></textarea>
  <p id="character-limit-info">You have 200 characters remaining</p>
</section>
querySelector()
recall
Step 2: Access the
textarea elementThe DOM is an interface. It represents html elements as objects and provides functions to access these objects. Let’s start by accessing the textarea element and its value. To access DOM elements, we can use a method on the DOM API - document.querySelector
We can create a javascript file, script.js, and link it to the html document using a script element:
| |
Inside script.js, we can call document.querySelector:
const textarea = document.querySelector("textarea");
document.querySelector takes a single argument a string containing a CSS selector (just like we use when defining what elements a CSS rule should apply to).
document.querySelector returns an element object representing the first element in the page which matches that CSS selector. This element object lets us inspect and modify the element in the page.
Here we have given it the string "textarea", which is the CSS selector used to look up the elements with tag name textarea. The function returns an element object, which represents the first textarea in the web page. Once we can access the textarea object, we can access its properties. In particular we want to access the value a user types into the textarea box. We can do this by accessing the value property:
const textarea = document.querySelector("textarea");
console.log(textarea.value); // evaluates to the value typed by the user
- On your local machine, set up a new directory with an
index.htmlandscript.js. - Make sure you start with the same static html as the example above.
- Double check your script file is linked to your html file.
- Try querying the DOM and accessing various elements like the
textareaelement.
🎬 Events
Learning Objectives
In the case of the textarea element, we want to update the p element text every time the user types inside the textarea. In other words, we want our application to react to the user typing on the keyboard. Currently our plan looks like this:
However, we’re missing a step in our plan. We need to find a way of running some code in response to an event.
Definition: events
Events are things that happen in the browser, which your code can ask to be told about, so that your code can react to them. In a browser context, an event could be a user clicking on a button, a user typing something into a textarea box, a user submitting a form etc. Not all events are in response to user actions, for instance there is an event for the browser finished initially rendering the page. You can find a complete reference all the different event types on MDN.
When a user presses a key in our textarea, the browser will create an event. If we asked the browser to tell us about it, we can respond to it. So we can update our plan as follows:
Notice a few things here:
- There’s no arrow between Step 3 and Step 4. The trigger for Step 4 is a user doing something - if the user doesn’t type anything in the textarea, Step 4 will never run (and neither will Step 5 and Step 6).
- We don’t run Step 4. The browser runs Step 4. In Step 3 we asked the browser to do something for us in the future. This is something new - up until now, we have always been the ones telling JavaScript what to do next.
📤 Reacting to events
Learning Objectives
As a user, we interact with the elements on a web page. We click on buttons, input text, submit forms etc.
To react to an event, we can declare a function that we want to run whenever a certain event occurs. We call this function an event handler. In the example below, we name this function updateCharacterLimit:
| |
We need to tell the browser to call updateCharacterLimit whenever a keyup event
addEventListener:
| |
Let’s break down the arguments that are passed to addEventListener.
"keyup"- this is the type of event we want to be notified aboutupdateCharacterLimit- the second argument is a function. It is a function that is called when an event occurs.
In JavaScript, we can pass functions as arguments to other functions. In this case, we’re passing a function updateCharacterLimit to addEventListener as an input. We can think of this as saying: whenever a key is released on the textarea element, then the browser will call the function updateCharacterLimit. Any code we want to run in response to the keyup event will need to be inside the updateCharacterLimit function.
We can add a log to updateCharacterLimit to check it is called every time the "keyup" event fires.
const characterLimit = 200;
const textarea = document.querySelector("textarea");

function updateCharacterLimit() {
  console.log("keyup event has fired... The browser called updateCharacterLimit...");
}

textarea.addEventListener("keyup", updateCharacterLimit);
<section>
  <h3>Character limit</h3>
  <label for="comment-input"
    >Please enter your comment in the text area below
  </label>
  <textarea
    id="comment-input"
    name="comment-input"
    rows="5"
    maxlength="200"
  ></textarea>
  <p id="character-limit-info">You have 200 characters remaining</p>
</section>
addEventListener to register that event handler for a keyup event.Add a
console.log to the event handler and check the event handler is being called when the event fires.Check the console tab in dev tools to see the log appear in the console.
📈 Check progress
Learning Objectives
Let’s use the plan from earlier to check our progress.
Let’s consider our code at the moment:
const characterLimit = 200;
const textarea = document.querySelector("textarea");

function updateCharacterLimit() {
  console.log("keyup event has fired... The browser called updateCharacterLimit...");
}

textarea.addEventListener("keyup", updateCharacterLimit);
We’ve done the following:
- Step 1: Defined a
characterLimit - Step 2: Accessed the
textareaelement - Step 3: Registered an event handler
updateCharacterLimit
The browser will do the following for us:
- Step 4: The browser will tell us when a user has pressed a key
We must still complete the following steps:
- Step 5: Calculate the number of characters left
- Step 6: Update the user interface with the number of characters left
To obtain the characters left, we can calculate the difference between characterLimit and the number of characters in the textarea element:
const characterLimit = 200;
const textarea = document.querySelector("textarea");

function updateCharacterLimit() {
  const charactersLeft = characterLimit - textarea.value.length;
  console.log(`You have ${charactersLeft} characters remaining`);
}

textarea.addEventListener("keyup", updateCharacterLimit);
<section>
  <h1>Character limit</h1>
  <textarea id="comment-input" rows="5" maxlength="200"></textarea>
  <label for="comment-input"
    >Please enter a comment in fewer than 200 characters
  </label>
  <p id="character-limit-info">You have 200 characters remaining</p>
</section>
Typing in to the textarea element, we should see a string like "You have 118 characters left" printed to the console each time a key is released. However, we have one final step: we must now update the DOM label with the information about how many characters are left.
🏷️ Updating the interface
Learning Objectives
We can calculate the remaining characters available every time a user’s key is released from the keyboard in the textarea. Finally, we must update the p element in the user interface with the number of characters remaining.
Step 5: Update the interface with the number of characters left
To achieve this goal, we’ll need to access the p element with id "character-limit-info" and then update the inner text. As before, we can use document.querySelector to access an element in the DOM using an appropriate CSS selector:
| |
p element is written inside the scope of updateCharacterLimit.Importance of helping each other prep
🤙🏽 FeedbackLearning Objectives
Preparation
Introduction
Importance of helping each other
🎯 Goal: To learn about importance of helping each other (45 minutes)
Helpers high
🎯 Goal: To understand helpers high and why it’s important to help (15 minutes)
Think about a time when you helped someone and felt a ‘helper’s high’ and also about a time when you helped someone and did not experience an increase of positive emotion.
Based on your two examples, in what way do you think you like helping others? For example, is it through giving your time, or does it make you happy when you can give someone some money or advice, etc.
- Write 2-3 sentences regarding this and share in a thread on Slack. One person can start the thread - if no one has started it yet, be the first one.